- Home
- About Us
- Products
- Rohmann Eddy Current
- Secu-Chek UV-LED Lamps
- Sonatest
- MR Chemie
- NOVO DR
- Hoffmann Tam Panels
- Desoutter Industrial Tools
- Novotest
- Integrated Design Tools (IDT Vision)
- Dakota NDT
- DeFelsko Corporation
- Sonotec Ultrasonic Solutions
- Sonotec Ultrasonic Hand-Tools
- G.A.L. Gage Company
- Western Instruments Inc.
- Esders Gas Technology
- Yoancomposite
- Hinode Electric
- Services
- News
- Contact Us
 (65) 6878 0608  (65) 6878 0609 |
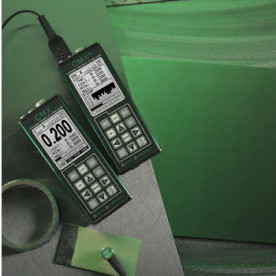
The CMX has all features of the MX & MMX gauges with a ton of advanced features. Measure material and coating thickness simultaneously, while still detecting pits & flaws in a single mode (PECT). Auto probe zero, auto probe recognition, auto temperature compensation are also included. Selectable Large Digits and B-Scan display options, up to 64 custom user definable setups, selectable transducer table for precision linearity, and material and coating calibration options are also available.
Our standard thru paint mode is is still included and ongoing. Switch between modes, according the transducer recognized or manually selected. 5 position 10dB gain switch allows the user to adjust to certain material types and be successful with common but difficult application scenarios. This gauge is really loaded with a ton of features and added benefits. It’s all very nicely packaged in a very small portable aluminum extrusion for extra durability. Our DakView java-based PC or MAC OSX software is also part of the kit.
CMX
| specifications | |
| Physical | Weight: 13.5 ounces (with batteries). Size: 2.5 W x 6.5 H x 1.24 D inches (63.5 W x 165 H x 31.5 D mm). Operating Temperature: -14° to 140°F (-10° to 60°C). Keyboard: Membrane switch with twelve tactile keys. Case: Extruded aluminum body with nickel-plated aluminum end caps (gasket sealed). Data Output: Bi-directional RS232 serial port. Windows® PC interface software. Display: 1/8 in. VGA grayscale display (240 x 160 pixels). Viewable area 2.4 x 1.8 in. (62 x 45.7mm). EL backlit (on/off/auto). |
| Power Source | Three 1.5V alkaline or 1.2V NiCad AA cells. Typically operates for 150 hours on alkaline and 100 hours on NiCad (charger not included.) Auto power off if idle 5 min. Battery status icon. |
| Display | Display Views: Large Digits Standard thickness view. Digit Height: 0.700 in (17.78 mm). B-Scan – Time based cross section view. Display speed of 15 secs per screen. Scan Bar 6 readings per second. Viewable in B-Scan and Large Digit views. Repeatability Bar Graph Bar graph indicates stability of reading. Feature Status Bar – Indicates features currently active. |
| Transducer | Transducer Types: Dual Element (1 to 10 MHz). Locking quick disconnect “00” LEMO connectors. Standard 4 foot cable. Custom transducers and cable lengths available for special applications. Features: 64 custom user-definable setups. Factory setups can also be edited by the user. Gates: Single gate in pulse-echo mode, or single gate with holdoff in echo-echo mode. Adjustable threshold. Selectable Transducers: Selectable transducer types with built-in dual path error correction for improved linearity. Alarm Mode: Set hi and lo tolerances with audible beeper and visual LEDs. Fast-Scan Mode: Takes 32 readings per second and displays the minimum reading found when the transducer is removed. Flaw Mode: Basic Prove-up flaw detection option using single element angle beam transducers. |
| Data Logger(Internal) | Log Formats: Grid (alphanumeric) Sequential (auto identifier) Cell Contents: Graphics On: 16.000 readings, B-Scan image & gauge settings for every reading. Graphics Off: 210,000 readings (coating, material, min & max) OBSTRUCT to indicate inaccessible locations. Memory: 32 megabit non-volitile ram. |
| Certification | Factory calibration: traceable to national standards. |
| Warranty | 2 year limited |
| Measuring | Range: Pulse-Echo Mode (P-E): (Pit&Flaw Detection) measures from 0.025 19.999 inches (0.63 to 500 millimeters). Pulse-Echo Coating Mode (PECT): (Material, Coating, Pit & Flaw Detection): Material: 0.025 to 19.999 inches (0.63 to 500 millimeters). Coating: 0.001 to 0.100 inches (0.01 to 2.54 millimeters). Pulse-Echo Temp Comp Mode (PETP): (Pit&Flaw Detection) Auto temperature compensation – measures from 0.025 19.999 inches (0.63 to 500 millimeters). Echo-Echo Mode (E-E): Thru Paint & Coatings) measures from 0.100 to 4.0 inches (2.54 to 102 millimeters). Range will vary +/- depending on the coating. Echo-Echo Mode (E-EV): Thru Paint & Coatings) measures from 0.050 to 1.0 inches (1.27 to 25.4 millimeters). Will vary based on coating. Coating Only Mode (CT): (Coating Thickness) Measures from 0.0005 to 0.100 inches (0.0127 to 2.54 millimeters). Range will vary +/- depending on the coating. Resolution: +/- .001 inches (0.01 mm) Velocity Range: .0492 to .5510 in./ms 1250 to 13995 meters/sec Calibration: Single and Two point calibration option for material & coating, or selection of basic material types. Units: English & Metric |
| Ultrasonic Specifications | Measurement Modes: Coating Off: Pulse-Echo (P-E) Coating On: Pulse-Echo Coating (PECT) Temp Comp: Pulse-Echo (PETP) Thru-Paint: Echo-Echo (E-E) Thru-Paint Verify: Echo-Echo Verify (E-EV) Coating Only: Coating (CT) Pulser: Dual square wave pulsers. Receiver: Dual receivers – manual or AGC gain control with 110dB range (limited). Timing: 25 MHz TCXO with single shot 100 MHz 8 bit ultra low power digitizer. |


