- Home
- About Us
- Products
- Rohmann Eddy Current
- Secu-Chek UV-LED Lamps
- Sonatest
- MR Chemie
- NOVO DR
- Hoffmann Tam Panels
- Desoutter Industrial Tools
- Novotest
- Integrated Design Tools (IDT Vision)
- Dakota NDT
- DeFelsko Corporation
- AVIONICS
- Sonotec Ultrasonic Solutions
- Sonotec Ultrasonic Hand-Tools
- G.A.L. Gage Company
- Western Instruments Inc.
- Esders Gas Technology
- Yoancomposite
- Hinode Electric
- Services
- News
- Contact Us
 (65) 6878 0608  (65) 6878 0609 |
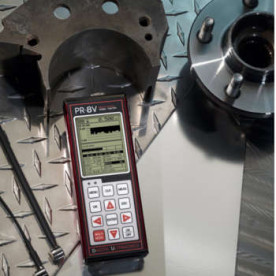
The time-based B-Scan feature of the PR-8V displays a cross section of the opposite surface, allowing engine builders the ability to see the contour of the back surface in cylinders while scanning.
Use the Multi-Mode (Echo-Echo mode) feature to measure chassis tubing with or without paint and coatings. Built-in automatic gain control and selectable low, medium, and high gain settings offer the inspector the additional punch power for materials that are hard to penetrate. The variety of calibration options is just one more example of the PR-8V’s versatility. Store up to 64 custom setups. Factory setups available for common applications.
The internal Data Logger of the PR-8V has been customized for both the engine builder and the chassis inspector. Selectable cylinder mapping or general alpha numeric file storage, and used in conjunction with our DakView java-based PC & MAC OSX software will satisfy your reporting need
PR-8V
| specifications | |
| Physical | Weight: 13.5 ounces (with batteries). Size: 2.5 W x 6.5 H x 1.24 D inches (63.5 W x 165 H x 31.5 D mm). Operating Temperature: -14° to 140°F (-10° to 60°C). Keyboard: Membrane switch with twelve tactile keys. Case: Extruded aluminum body with nickel-plated aluminum end caps (gasket sealed). Data Output:Bi-directional RS232 serial port. Windows® PC interface software. Display: 1/8 in. VGA grayscale display (240 x 160 pixels). Viewable area 2.4 x 1.8 in. (62 x 45.7mm). EL backlit (on/off/auto). |
| Power Source | Three 1.5V alkaline or 1.2V NiCad AA cells. Typically operates for 150 hours on alkaline and 100 hours on NiCad (charger not included.) Auto power off if idle 5 min. Battery status icon. |
| Display | Display Views: Large Digits Standard thickness view. Digit Height: 0.400 in (10mm). B-Scan Cross sectional view. Display speed of 15 secs per screen. Scan Bar 6 readings per second. Viewable in B-Scan and Large Digit views. Repeatability Bar Graph Bar graph indicates stability of reading. |
| Transducer | Transducer Types: Dual Element (1 to 10 MHz). Locking quick disconnect “00” LEMO connectors. Standard 4 foot cable. Custom transducers and cable lengths available for special applications. |
| Data Logger(Internal) | 12,000 readings and B-Scans (alpha numeric storage). OBSTRUCT to indicate inaccessible locations. Memory: 16 megabit non-volatile ram. |
| Certification | Factory calibration: traceable to national standards. |
| Warranty | 2 year limited |
| Ultrasonic Specifications | Measurement Modes: Pulse-Echo (flaws, pits). Echo-Echo (thru-paint – chassis tubing) Pulser: Square wave pulser Receiver: Selectable low, medium, or high gain in Pulse-Echo mode or AGC gain control in Echo-Echo mode. Timing:20 MHz with ultra low power. 8 bit digitizer. |
| Measuring | Range: Pulse-Echo Mode: (Pit&Flaw Detection) measures from 0.025 9.999 inches (0.63 to 254 millimeters). Echo-Echo Mode: Thru Paint & Coatings) measures from 0.05 to 4.0inches (1.27 to 102 millimeters). Range will vary +/- depending on the thickness of coating. Resolution: +/- .001 inches (0.01 mm) Velocity Range: .0492 to .3936 in./ms 1250 to 9999 meters/sec Single and Two point calibration option, or selection of basic material types. Units: English & Metric |
| Features | Setups: 64 custom user-definable setups. Factory setups can also be edited by the user. Selectable Transducers: Selectable transducer types with built-in dual path error correction for improved linearity. Alarm Mode: Set hi and lo tolerances with audible beeper and visual LEDs. Fast-Scan Mode: Takes 32 readings per second and displays the minimum reading found when the transducer is removed. |


